Wing Chun Dummy/Help Finding One or a Punching Dummy

ilhe4e12345

Green Belt
Joined
Apr 5, 2011
Messages
105
Reaction score
1
Location
NEPA (North Eastern PA)
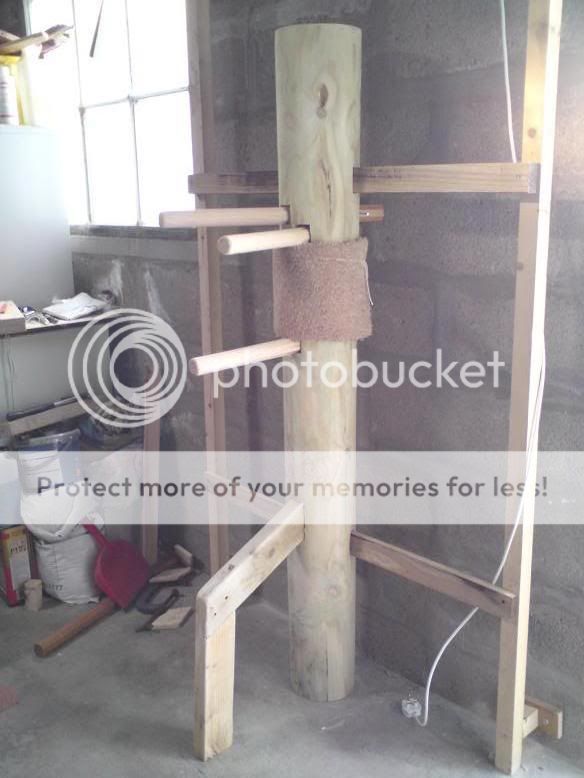
So everyone the title should say it all. I am looking into getting myself a wing chun dummy. I want it for the obvious wing chun reasons (practice and the like) but i know those type of dummies are also good for 7 Star Praying Mantis so i thought since 7 Star is my main style i practice this could help with both.

Anyways anybody have any ideas? I know buying one is usually from 700-1200 dollars...which i dont have that kind of cash...NOW i did see something that looked kind of like this only had the wing chun arms, see my link below:

http://www.robbinssports.com/centur...-p-7322.html?zenid=kmvsj93d35t2slusdscdnhqiq2

what im wondering is does anybody know of where i could find something like that? I know it wouldnt have the leg or anything on it so i would have to hit the abse of the unit but im just wondering what anybody out there thinks.

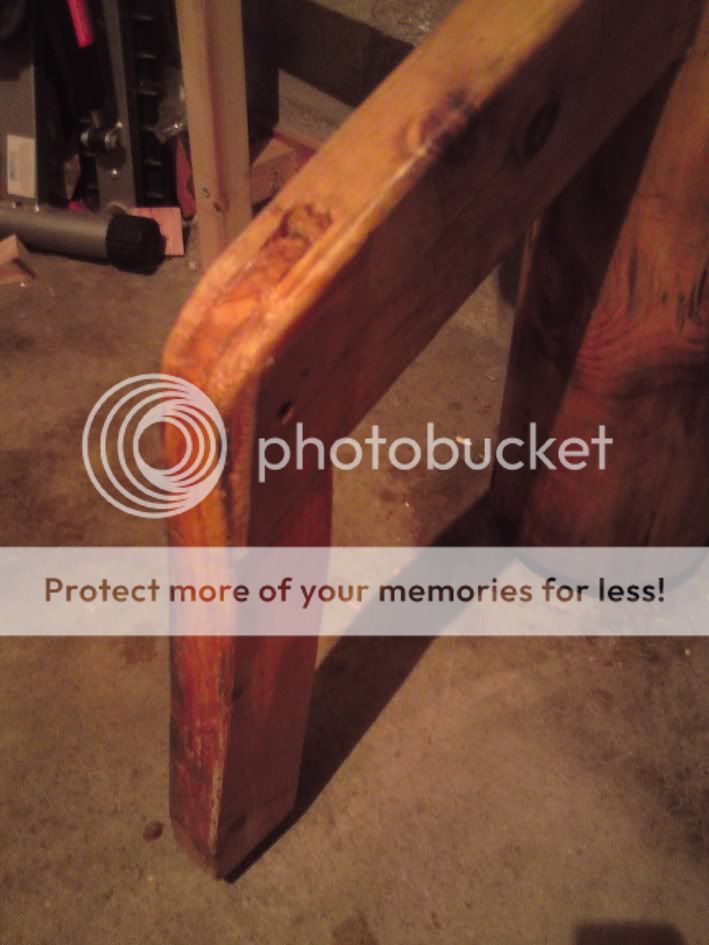
I also thought about building one but due to me...no construction abilities i dont think it would come out even half way decent....even if i follow the instructions. Pricing one out to build would end up around 250 dollars (thats based off of plans i found online from kung uf magazine and local parts) BUT im also worried that i would have to get the arms milled and that can get pricey....

any suggestions would be fantastic as this dummy would be something that could help my training greatly :)

happy training :)
 

almost a ghost

Blue Belt
Joined
Oct 26, 2006
Messages
230
Reaction score
11
Location
Whitney Ranch, Henderson, NV
woodendummy.net

I was fortunate enough to get one of the last solid wood dummies and I'm very happy with, but I really like the look of the stacked dummies. He also sells full PVC dummies (PVC body, wooden arms/leg) for half the price of a wooden dummy.

That site and a number of others also just sells the arms and the legs, usually around $200-230 for the complete set.
 

fighterman

Yellow Belt
Joined
Oct 6, 2011
Messages
53
Reaction score
2
here in italy in naples theres a giuy that is selling wooden dummeys imported from hong kong i think for about 480 euros without transportation
 

Domino

Black Belt
Joined
Apr 14, 2009
Messages
519
Reaction score
1
Location
Preston
You say you can't afford but you can have anything you want. Pagoda have got a load of new dummies in aswell as long poles.
 

MacPedro

Yellow Belt
Joined
Apr 14, 2011
Messages
46
Reaction score
0
Ilhe,
putting up shelves and plastering over cracks is kinda my limit with DIY but with the correct mentality and the right preparation I psyched myself up to build one. Aside from the cost of the tools it cost me £20. I did have some spare wood in the garage for the supports and some table legs which became the three arms, factoring these in may push the expense a little higher, though in this age of recycling I am sure the local 'midden' would let you rummage for a small backhander.
It took me 15 hours or so to get it knocked into shape but I have spent time tuning it since. The biggest drawback is that I used an ordinary 'strainer post' ( the big trees at the ends of a wood and wire fence) as the body. What I thought was some kind of chemical antifungal treatment turned out to be just rain water. I should have let it dry properly before mounting it on my garage wall because a few times I've went to it after work and it's been thick with mould *eeewww!*
Nothing jeyes fluid didn't remedy. I've since oiled it and it's better but not Ideal.

My point is that any local handyman with the correct financial incentive will be able to get you something workable to begin learning the sections. Another alternative I've read about is polythene pipe used for gas mains. It could be filled with rocks or sand or something for weight and would be much easier to work with. I'll see if I can find a photo.

Pedro

P.S. I've since removed a few inches from the lower portion which was dragging on the ground and this has really livened it up. Also I've resculpted the leg for more of an angle.
mookie.jpg


P.P.S. I used a number of youtube videos as my guide for scribing out but I also had some plans from Sifu Shaun Rawcliffs book on the Dummy.
 

David43515

Master Black Belt
Joined
Mar 10, 2009
Messages
1,383
Reaction score
50
Location
Sapporo, Japan
You know, there are DIY videos on Youtube. They`re not difficult to make, and you could size it to fit yourself instead of a typical resident of Hong Kong.

Use a 4x4 about a meter long as your core. Then glue on 2x6`s that are roughly 1.8 meters long followed by 2x8`s. You can drill the holes for the arms , leg, and a lateral supports (if you want them) as you go. Cut the corners off with a circular saw. That gives you a basic octogon that you can round off with a rasp or plane. The short 4x4 in the core let`s you slide the dummy down over another 4x4 you put in the ground like a fence post. A few coats of varnish and voila, you have a dummy your own size you can move inside or out, and it shouldn`t cost more than $50 even if you have to buy all the lumber.
 

MacPedro

Yellow Belt
Joined
Apr 14, 2011
Messages
46
Reaction score
0
Cheers Neneek,
it's indescribable the affection you can develop for an inanimate object....in a wholesome and not remotely creepy way :) I do plan on machining new/thicker arms once I source lumber. Power planes are soo handy.
Pedro
 

naneek

Green Belt
Joined
May 29, 2008
Messages
179
Reaction score
2
Location
auckland new zealand
how did you make the joint for the "knee" part of the leg, and what angle is the mitre at in relation to the body? sorry to ask but that is the last mitre i have to cut through the body on my dummy which looks a bit rougher than yours mate!!
 

MacPedro

Yellow Belt
Joined
Apr 14, 2011
Messages
46
Reaction score
0
Naneek,
I think I just cut a slot in the 'non-vertical' section (saw in line with the timber and use a narrow chisel to part the innards) then cut away cheeks in the shin bit. To get the angles I had the 'non-vertical' bit fitted first and laid the vertical wood against it for scribing out the lines. The rest was evo-stik glue and a couple of screws to hold it while the glue set.
It seems robust enough. The fiddley bit was the angle that was bored through the body of the dummy. I can't remember exactly how I did this (I was on a roll). I think I had a mitre gauge strapped to the body, against which I followed the angle with an auger bit in my drill. Incidentally a battery drill may have a job with the size of the bore. A pluggy in one will do much better. If you don't have a mitre gauge you can bash a couple of bits of wood Mookleg.jpg.Mookleg.jpg a protractor for a guide and tape this to the body before you start drilling.

Mookleg.jpg

It can be difficult to visualize but if you start trying to put the pieces together or even trying to put together cardboard models of it.... the solutions present themselves. Trust me, apart from the youtube videos to guide me, I didn't know what I was doing. Passion can light your way. Passion and caution. Passion and caution and the understanding that you can measure as often as you like, but you can only cut once :)

If you need any more (semi-) constructive advice feel free to ask. I have to warn you though I'm by no means an authority on the subject :)

Best of luck,
Pete
 

mook jong man

Senior Master
Joined
May 28, 2008
Messages
3,080
Reaction score
263
Location
Matsudo , Japan
Naneek,
I think I just cut a slot in the 'non-vertical' section (saw in line with the timber and use a narrow chisel to part the innards) then cut away cheeks in the shin bit. To get the angles I had the 'non-vertical' bit fitted first and laid the vertical wood against it for scribing out the lines. The rest was evo-stik glue and a couple of screws to hold it while the glue set.
It seems robust enough. The fiddley bit was the angle that was bored through the body of the dummy. I can't remember exactly how I did this (I was on a roll). I think I had a mitre gauge strapped to the body, against which I followed the angle with an auger bit in my drill. Incidentally a battery drill may have a job with the size of the bore. A pluggy in one will do much better. If you don't have a mitre gauge you can bash a couple of bits of wood Mookleg.jpg.Mookleg.jpg a protractor for a guide and tape this to the body before you start drilling.

Mookleg.jpg

It can be difficult to visualize but if you start trying to put the pieces together or even trying to put together cardboard models of it.... the solutions present themselves. Trust me, apart from the youtube videos to guide me, I didn't know what I was doing. Passion can light your way. Passion and caution. Passion and caution and the understanding that you can measure as often as you like, but you can only cut once :)

If you need any more (semi-) constructive advice feel free to ask. I have to warn you though I'm by no means an authority on the subject :)

Best of luck,
Pete

MacPedro nice unit you've built there , I only have experience training on dummies with tapered arms .

What would you say is the difference in feel between training on the tapered arm model and the straight arm model?
I would imagine it would have some effect in applying shearing elbow force , but I'm not sure .

I reckon more people would probably build their own dummies if it wasn't such a pain in the **** to make the tapered arms.
 

ride57

Yellow Belt
Joined
Nov 6, 2010
Messages
24
Reaction score
0
Location
WA
I think I have about $50 in this. %-}
Its a fence post, 3 baseball bats and the leg is 2 sections out of a old IKEA chair. I will wrap it with some heavy canvas I have.

doug066.jpg


This is one I got for inside:

doug004.jpg
 

MacPedro

Yellow Belt
Joined
Apr 14, 2011
Messages
46
Reaction score
0
Ride 57,
:) Cute :) Sifu Spongebob gazes on with knowing nod.
Pedro
 

MacPedro

Yellow Belt
Joined
Apr 14, 2011
Messages
46
Reaction score
0
Mook JM,
I can't really compare to a dummy with more tapered arms as this is the only one I have used. The arms are a little more tapered than when that photo was taken in March, but they're still no wider than 45mm at their widest. I believe 60mm is a more appropriate diameter at the trunk end. I don't know if it's because of the thin arms or the fact I just got back to it after a week away working but I was doing sorta sloppy Bong Saus. I had to focus a little better to remember correct forward intent.

I have a lathe under several cubic metres of Cardboard boxes in the garage with the Dummy. Storage wars anyone :) Once I get these disposed off (yard sale at Pedros) I'll whack up some new arms.

Pedro
 

mook jong man

Senior Master
Joined
May 28, 2008
Messages
3,080
Reaction score
263
Location
Matsudo , Japan
Mook JM,
I can't really compare to a dummy with more tapered arms as this is the only one I have used. The arms are a little more tapered than when that photo was taken in March, but they're still no wider than 45mm at their widest. I believe 60mm is a more appropriate diameter at the trunk end. I don't know if it's because of the thin arms or the fact I just got back to it after a week away working but I was doing sorta sloppy Bong Saus. I had to focus a little better to remember correct forward intent.

I have a lathe under several cubic metres of Cardboard boxes in the garage with the Dummy. Storage wars anyone :) Once I get these disposed off (yard sale at Pedros) I'll whack up some new arms.

Pedro

I'm not 100% sure on this because I would have to train on one with non tapered arms to be certain , but my feeling is that the tapered arms due to the angle of the taper might offer a degree of resistance to our arms as they are shearing up the arms of the dummy .

Particularly in the opening sequence of the form where we are wedging our guard forward between the arms , this would aid in the development of forward force , if that angle of taper is not there as in the case of the non tapered arms then I don't think the resistance will be the same.

But at the end of the day mate we have to make do with what we've got and those tapered arms are probably a real bastard to make and get right .
 

naneek

Green Belt
Joined
May 29, 2008
Messages
179
Reaction score
2
Location
auckland new zealand
Thanks for the info MacPedro, now once my father in law gets his crap out of my garage and i can get to my tools i will try to fit a leg to my dummy. by the way i am using a joiners brace to bore the holes as i dont have a power drill, takes a while longer to drill the holes but does the job.
 

mike-z

White Belt
Joined
Aug 3, 2013
Messages
5
Reaction score
0
hi..i´m having the same problem and find this site www.di-survival.com

it looks great akready contact the guys,are very friendly ,the guy the builds it is the guy that reply to us seem to be na honest one..will buy some stuff to check .
 

jeff_hasbrouck

Green Belt
Joined
Aug 31, 2012
Messages
165
Reaction score
1
Location
Bismarck, ND
Honestly man, just have somebody make it for you, or save up the cash.

I built one myself and it did the job, but nothing can replace professional work.

The WC/WT dummy trains more than just strikes, so if your looking at it for another style, see what it needs to be effective for your uses.

Like the dummy I want is a stand alone, because there is a lot of important footwork that comes out of the dummy form. Also I like having free range of motion and I don't really want to attach it to a wall or anything, but i'm sacrificing the resilience and the "bounce" you would get off a wall mounted one.

All the best in your search, but if you want one, make sure you get the right one; And dont skimp on it just because you don't have the funds, just save up.
 

mike-z

White Belt
Joined
Aug 3, 2013
Messages
5
Reaction score
0
now i find that some of my friends already buy from this seller..the feedback is great!!
 

Latest Discussions

Top